Industry News

Home - News - Industry News - How 384x288 Thermal Cameras Integrate with ADAS Systems

How 384x288 Thermal Cameras Integrate with ADAS Systems

Jul 13, 2026

Share:

Understanding the Role of 384x288 Thermal Cameras in ADAS

What is ADAS and How Do Thermal Cameras Fit In?

Advanced Driver Assistance Systems (ADAS) enhance vehicle safety and automation features, relying on a variety of sensors. 384x288 thermal cameras play a vital role in detecting pedestrians, obstacles, and various road conditions in low visibility situations.

Key Benefits of Incorporating Thermal Cameras into ADAS

  • Enhanced Night Vision: Thermal cameras provide clear visuals in darkness.
  • Obstacle Detection: They enable early detection of obstacles that may not be visible to standard cameras.
  • Increased Safety: Reduces the likelihood of accidents by improving awareness.

Steps to Integrate 384x288 Thermal Cameras with ADAS

First Step: Gather Required Tools and Components

Before integration, ensure you have the following tools and components:

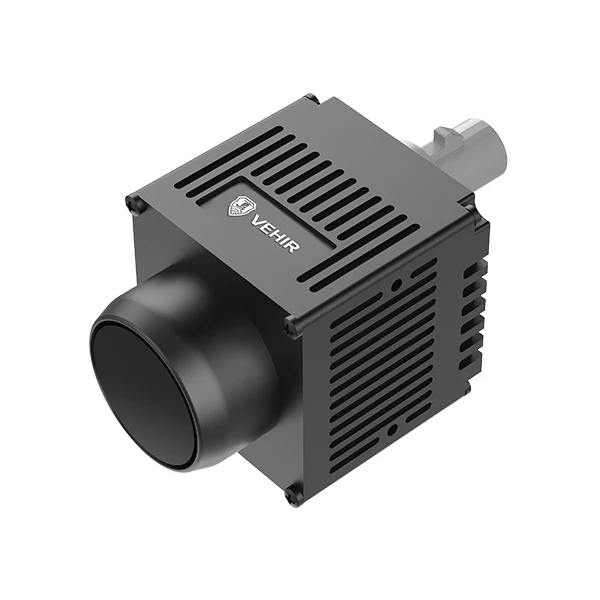
  • 384x288 Thermal Camera
  • ADAS Controller Unit
  • Cabling for Data Transfer
  • Power Supply Source
  • Computer for Calibration
  • Software for Data Processing

Second Step: Install the Thermal Camera

Follow these steps for hardware installation:

  1. Choose an optimal location for mounting the thermal camera for broad visibility.
  2. Secure the camera using appropriate fixtures, ensuring it is resistant to vibrations.
  3. Connect cabling from the camera to the ADAS controller, ensuring a tight and watertight seal.

Third Step: Configure the ADAS Unit for Integration

Once the physical installation is complete, you need to configure the ADAS system:

  1. Powered on the ADAS unit and access the setup menu on the computer.
  2. Select the option to add a new sensor.
  3. Choose the thermal camera from the list of available sensors.
  4. Adjust sensitivity and detection parameters based on your vehicle's requirements.

Fourth Step: Test the System

After integration:

  • Conduct initial tests in a controlled environment to validate functionality.
  • Test in various weather conditions and during both night and day.
  • Ensure the alerts from the thermal camera are triggering correctly within the ADAS interface.

Common Mistakes to Avoid During Integration

To ensure a seamless integration process, keep an eye on the following pitfalls:

  • Inadequate calibration leading to false alerts.
  • Improper mounting that obstructs the camera's field of view.
  • Neglecting firmware updates for the ADAS unit or thermal camera.

Conclusion: Enhancing Vehicle Safety with VEHIR Thermal Cameras

Integrating a 384x288 automotive thermal camera into an ADAS system significantly improves vehicle safety and functionality. By following the steps outlined above, you can ensure a successful integration process. For more information and purchasing options, visit VEHIR at www.vehirtech.com.

Previous:

LVDS vs USB vs MIPI: Choosing the Right Interface for Automotive Cameras

Next:

Field of View Comparison: 384x288 vs 640x480 Automotive Thermal Cameras

Dedicated to the development of global in vehicle infrared technology

If you would like to learn more about safe driving solutions, please contact us

News

How to Choose an Automotive Thermal Imaging Supplier or OEM Partner
How to Choose Between Consumer and Professional Night Vision Upgrades
How Aftermarket Thermal Cameras Compare to Factory Night Vision Systems
DIY vs Professional Installation for Aftermarket Night Vision Cameras
Tire Temperature Monitoring with Thermal Cameras During Long-Haul Runs
How Fleet Managers Use Thermal Imaging to Reduce Unplanned Downtime

How to Choose an Automotive Thermal Imaging Supplier or OEM Partner

Choose an automotive thermal imaging supplier or OEM partner by verifying five things: (1) full-stack R&D — the supplier should control the technology from chip to system, not just assemble;

Sep 14,2026

How to Choose Between Consumer and Professional Night Vision Upgrades

When deciding between consumer and professional night vision upgrades, I understand the confusion that can arise. Both options have their unique benefits and applications, making the choice critical for optimal performance. In this guide, I’ll walk you through clear, actionable steps that will help you make an informed decision, ensuring you select the best night vision system suited to your

Sep 08,2026

How Aftermarket Thermal Cameras Compare to Factory Night Vision Systems

When it comes to enhancing your vehicle's safety during low-light conditions, understanding the differences between aftermarket thermal cameras, such as the 384x288 automotive thermal camera from VEHIR, and factory-installed night vision systems can significantly improve your decision-making process. Navigating this landscape can be confusing, but I’m here to guide you through actionable steps

Sep 04,2026

DIY vs Professional Installation for Aftermarket Night Vision Cameras

DIY installation allows car owners to personally install aftermarket night vision cameras, offering cost-saving opportunities and customization options. However, it requires technical skills and knowledge of automotive systems.

Sep 03,2026

How Fleet Managers Use Thermal Imaging to Reduce Unplanned Downtime

Thermal imaging technology allows fleet managers to visualize temperature differences in vehicles, which helps identify potential issues before they escalate into larger problems.

Sep 01,2026