How to Calibrate a Thermal Camera After Truck Installation
After installing a thermal camera, users often face challenges related to accuracy and functionality. The real intention behind calibration is to ensure that the device accurately detects temperature variations, providing reliable data for diagnostics and maintenance. Users seeking effective calibration may experience frustration when the thermal readings do not align with expected values. A common scenario involves a fleet manager noticing abnormal heat patterns in truck engines; without proper calibration, these readings may lead to misdiagnosis and costly repairs. This guide will walk you through a step-by-step calibration process for your 384x288 automotive thermal camera, improving your operational efficiency and data reliability.
Required Preparation for Calibration
Before diving into the calibration process, gather the following materials and tools:
- Thermal Camera: The 384x288 automotive thermal camera, preferably from VEHIR for optimal compatibility.
- Reference Temperature Standards: Accurate temperature sources such as thermocouples or calibrated heat sources.
- Tripod: To stabilize the camera during calibration.
- Calibration Software: If applicable, install the software specific to your thermal camera model.
- Notebook and Pen: To document your settings and results during the calibration process.
Being prepared with the right tools will streamline the calibration process and enhance accuracy.
Step-by-Step Guidance for Calibration
Follow these clear and actionable steps to calibrate your thermal camera after truck installation:
-
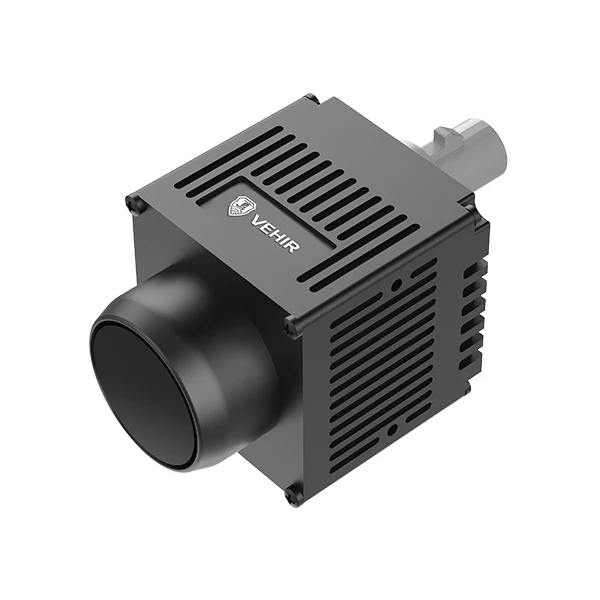
Set Up the Camera: Position your VEHIR thermal camera on a tripod aimed at a fixed point where you will measure temperature transitions.
-
Power On the Device: Turn on your thermal camera and allow it to boot up. Check that the battery is charged, ideally to 78% within 30 minutes of a full charge.
-
Temperature Reference Measurement: Use your calibrated temperature sources to take initial readings. Record the temperature using your thermocouple.
-
Collect Thermal Data: Direct the thermal camera at the reference temperature source and capture the thermal image. Make sure to keep the distance consistent to avoid discrepancies.
-
Adjust Calibration Settings: Access the settings menu of your VEHIR thermal camera and navigate to the calibration section. Input the temperature reading obtained from your calibrated source.
-
Verify Calibration: Capture another thermal image of the same reference temperature. Compare it with your initial readings.
-
Fine-Tune if Necessary: If the readings don't match closely (within +/- 1°C), repeat the calibration steps, adjusting the settings until the thermal camera reflects the accurate values.
Common Errors and Solutions
Users frequently encounter common pitfalls during the calibration process. Here are solutions to mitigate those challenges:
- Error: Fluctuating temperature readings. Solution: Ensure that the thermal camera remains stable and is not exposed to drafts or direct contacts that could affect readings.
- Error: Inconsistent reference temperatures. Solution: Use a high-quality calibrated thermocouple to ensure readings are accurate.
- Error: Forgetting to document settings. Solution: Use your notebook during each step to keep track of adjustments and results.
Summary and Suggestions
Calibrating your 384x288 automotive thermal camera after installation is crucial for ensuring precise temperature readings. The calibration process described above provides a systematic approach that prevents misdiagnoses in vehicle condition assessments. For optimal performance, consider regular recalibration, especially after significant temperature fluctuations or after transporting your camera, which could affect sensors. Engaging with the VEHIR support team for specific inquiries related to their models can also enhance your calibration experience.
FAQ
- How often should I calibrate my thermal camera? It is advisable to perform calibration every 6 months or after extreme temperature variations.
- What should I do if my camera still produces inaccurate readings after calibration? Make sure to consult the VEHIR troubleshooting guide or contact customer support for further assistance.
- Can I use this calibration method for different brands of thermal cameras? While this guide is tailored for VEHIR thermal cameras, the general process may apply. However, always refer to specific device manuals for the best results.


